Hey there! Today, I have a unique item to share with you. Imagine a dish that’s not just a delight to your taste buds but also the star of any party table. Yes, I’m talking about Aunt Myrna’s party cheese salad. This dish is a fantastic fusion of flavors that’s guaranteed to make your guests ask for seconds. And the best part? It’s incredibly easy to make. So, let’s dive right into making this cheesy marvel that’s bound to be the highlight of your next get-together.
Table of Contents
ToggleAunt Myrna’s Party Cheese Salad Recipe Overview
Before we roll up our sleeves and start, here’s a quick glance at what you’re signing up for:
- Course: Appetizer
- Cuisine: American
- Total Servings: 8
- Prep Time: 15 minutes
- Cook Time: 0 minutes
- Total Time: 15 minutes
Equipment Needed
I bet you’re eager to start whipping up Aunt Myrna’s party cheese salad. You’ll be glad to know you don’t need any fancy gadgets for this recipe. Just some basic kitchen tools:
- Mixing bowl
- Electric mixer or whisk
- Spatula
- Serving dish
Trust me, with these at your disposal, you’re all set to create a cheesy masterpiece that’s both a feast for the eyes and the palate.
Ingredients for Aunt Myrna’s Party Cheese Salad
| Ingredient | Quantity |
|---|---|
| Cream cheese, softened | 1 cup (8 oz) |
| Crushed pineapple, drained | 1 cup |
| Green bell pepper, finely chopped | 1/4 cup |
| Red bell pepper, finely chopped | 1/4 cup |
| Pecans, chopped | 1/2 cup |
| Gelatin (flavor of your choice) | 1 packet (3 oz) |
| Whipped topping | 1 cup |
| Cheddar cheese, shredded | 1 cup |
Fact: Did you know that pineapple is not just tasty but also packed with enzymes that can help in digestion? A sweet way to keep your tummy happy!
Step by Step Instructions
Mixing the Base
- In your mixing bowl, blend the cream cheese until it’s smooth and creamy.
- Add the crushed pineapple, green and red bell peppers, and pecans. Mix thoroughly until all the ingredients are well combined.
Here’s a little secret: the mix of colors not only makes this salad visually appealing but also adds a burst of flavors.
Setting the Salad
- Prepare the gelatin according to the packet instructions and let it cool slightly.
- Once cooled, gently fold the gelatin and whipped topping into the cream cheese mixture.
- Add the shredded cheddar cheese and mix well.
This step is crucial for getting that perfect, fluffy texture that makes our cheese salad so irresistible.
Chilling to Perfection
- Using a spatula, smooth the top of the mixture after transferring it to a serving platter.
- Refrigerate for at least 2 hours, or until the salad is firm and set.
A little patience here goes a long way. The chill time allows all the flavors to meld beautifully.
Additional Tips for Perfect Aunt Myrna’s Party Cheese Salad
- For an extra touch of flair, garnish your salad with some extra chopped pecans or a sprinkle of paprika before serving.
- If you’re pressed for time, chilling the salad in the freezer for about 30 minutes can speed up the setting process. Just make sure to keep an eye on it to prevent freezing.
Nutrition in Aunt Myrna’s Party Cheese Salad
| Nutrient | Amount per serving |
|---|---|
| Calories | 250 kcal |
| Protein | 7 g |
| Carbohydrates | 15 g |
| Fat | 18 g |
| Cholesterol | 35 mg |
| Sodium | 200 mg |
Please note that these values are approximations. Actual nutritional content may vary based on specific ingredient brands and sizes.
What Makes Aunt Myrna’s Party Cheese Salad Delicious
The secret to the irresistible taste of party cheese salad lies in its perfect balance of textures and flavors. The creamy base, combined with the crunch of pecans and the freshness of bell peppers, creates a symphony in your mouth. Plus, the addition of pineapple adds a delightful sweetness that complements the savory elements beautifully.
Fact: Cheese is not just tasty; it’s also filled with nutrients like calcium and protein. Who knew indulging could feel so good?
Stay tuned for the next part of the article, where we’ll dive into FAQs, offer more tips, and wrap up with a tasty conclusion.
FAQs about Aunt Myrna’s Party Cheese Salad
Can I make Aunt Myrna’s party cheese salad a day ahead?
Absolutely! In fact, making it a day ahead allows the flavors to blend even better. Simply refrigerate it until you’re ready to serve it, covered.
What can I use instead of pecans?
If you’re not a fan of pecans or have an allergy, walnuts or almonds make great substitutes. They still add that crunchy texture that takes the salad to the next level.
Is there a vegetarian gelatin option?
Yes, agar-agar is a fantastic vegetarian alternative to gelatin. It’s derived from seaweed and works just as well for setting the salad.
Can I add other fruits to the salad?
Sure thing! While pineapple gives a nice sweetness, adding other fruits like grapes or diced apples can introduce new flavors and textures.
How should I serve Aunt Myrna’s party cheese salad?
It’s best served chilled on a bed of lettuce leaves. You can also serve it as a spread with a side of crackers or sliced baguette.
Conclusion
Aunt Myrna’s party cheese salad is not just a dish; it’s a celebration of flavors and textures that come together to create something truly special. It’s the kind of recipe that makes you feel like a culinary wizard, even if you’re just mixing a few simple ingredients. Whether it’s a family gathering, a potluck, or just a treat for yourself, this salad is bound to impress.
Remember, cooking is all about putting your heart into it. So, don’t be afraid to tweak the recipe and make it your own. After all, every great recipe has a little bit of personal flair. And who knows? Maybe one day, someone will be asking you for your secret to making the perfect party cheese salad.
I’d love to hear your thoughts, questions, or feedback on this recipe. Did you add your own twist? How did it turn out? Your experiences enrich our cooking community and inspire others to explore their culinary skills. So, don’t hold back—share your party cheese salad stories below!
Check out some more delicious appetizers:
- Ruby Tuesday’s Broccoli Salad Recipe
- Mark’s Feed Store Potato Salad Recipe
- Wawa Chicken Salad Recipe: A Delight in Every Bite
- Red Lobster Sausage Balls Recipe: A Culinary Delight
- Bahama Breeze Empanada Recipe: A Tropical Delight
- Papas Locas Recipe: Dive into Flavor Paradise
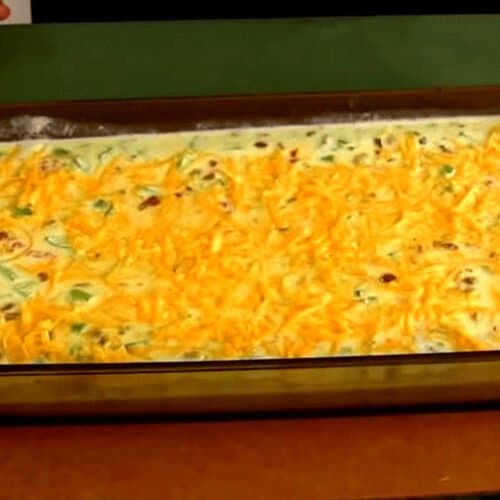
Aunt Myrna’s Party Cheese Salad
Equipment
- Mixing bowl
- Electric mixer or whisk
- Spatula
- Serving dish
Ingredients
- 1 cup 8 oz Cream cheese, softened
- 1 cup Crushed pineapple drained
- 1/4 cup Green bell pepper finely chopped
- 1/4 cup Red bell pepper finely chopped
- 1/2 cup Pecans chopped
- 1 packet 3 oz Gelatin (flavor of your choice)
- 1 cup Whipped topping
- 1 cup Cheddar cheese shredded
Instructions
Mixing the Base
- In your mixing bowl, blend the cream cheese until it’s smooth and creamy.
- Add the crushed pineapple, green and red bell peppers, and pecans. Mix thoroughly until all the ingredients are well combined.
Setting the Salad
- Prepare the gelatin according to the packet instructions and let it cool slightly.
- Once cooled, gently fold the gelatin and whipped topping into the cream cheese mixture.
- Add the shredded cheddar cheese and mix well.
Chilling to Perfection
- Using a spatula, smooth the top of the mixture after transferring it to a serving platter.
- Refrigerate for at least 2 hours, or until the salad is firm and set.
Notes
- For an extra touch of flair, garnish your salad with some extra chopped pecans or a sprinkle of paprika before serving.
- If you’re pressed for time, chilling the salad in the freezer for about 30 minutes can speed up the setting process. Just make sure to keep an eye on it to prevent freezing.

